> ## Documentation Index
> Fetch the complete documentation index at: https://developers.plane.so/llms.txt
> Use this file to discover all available pages before exploring further.
# Configure GitLab Application for Plane integration
This guide walks you through setting up a GitLab application to enable GitLab integration for your Plane workspace on a self-hosted instance. Since self-hosted environments don’t come pre-configured for GitLab, you’ll need to create an application, configure authentication, and set the necessary permissions to ensure seamless integration.
This guide covers configuration for both:
* **[GitLab.com](/self-hosting/govern/integrations/gitlab?edition=gitlab-cloud#create-gitlab-application)**\
The standard cloud-hosted GitLab service
* **[GitLab Self-managed](/self-hosting/govern/integrations/gitlab?edition=gitlab-self-managed#create-gitlab-application)**\
Self-hosted GitLab instances for organizations with specific compliance or security requirements
In this guide, you’ll:
1. [Create and configure a GitLab Application](/self-hosting/govern/integrations/gitlab#create-gitlab-application)
2. [Configure your Plane instance](/self-hosting/govern/integrations/gitlab#configure-plane-instance)
**Activate GitLab integration**
After creating and configuring the GitLab application and configuring the instance as detailed on this page, you'll need to [setup the GitLab integration](https://docs.plane.so/integrations/gitlab) within Plane.
## Create GitLab Application
1. On the left sidebar in GitLab, select your avatar.
2. Select **Preferences** tab.
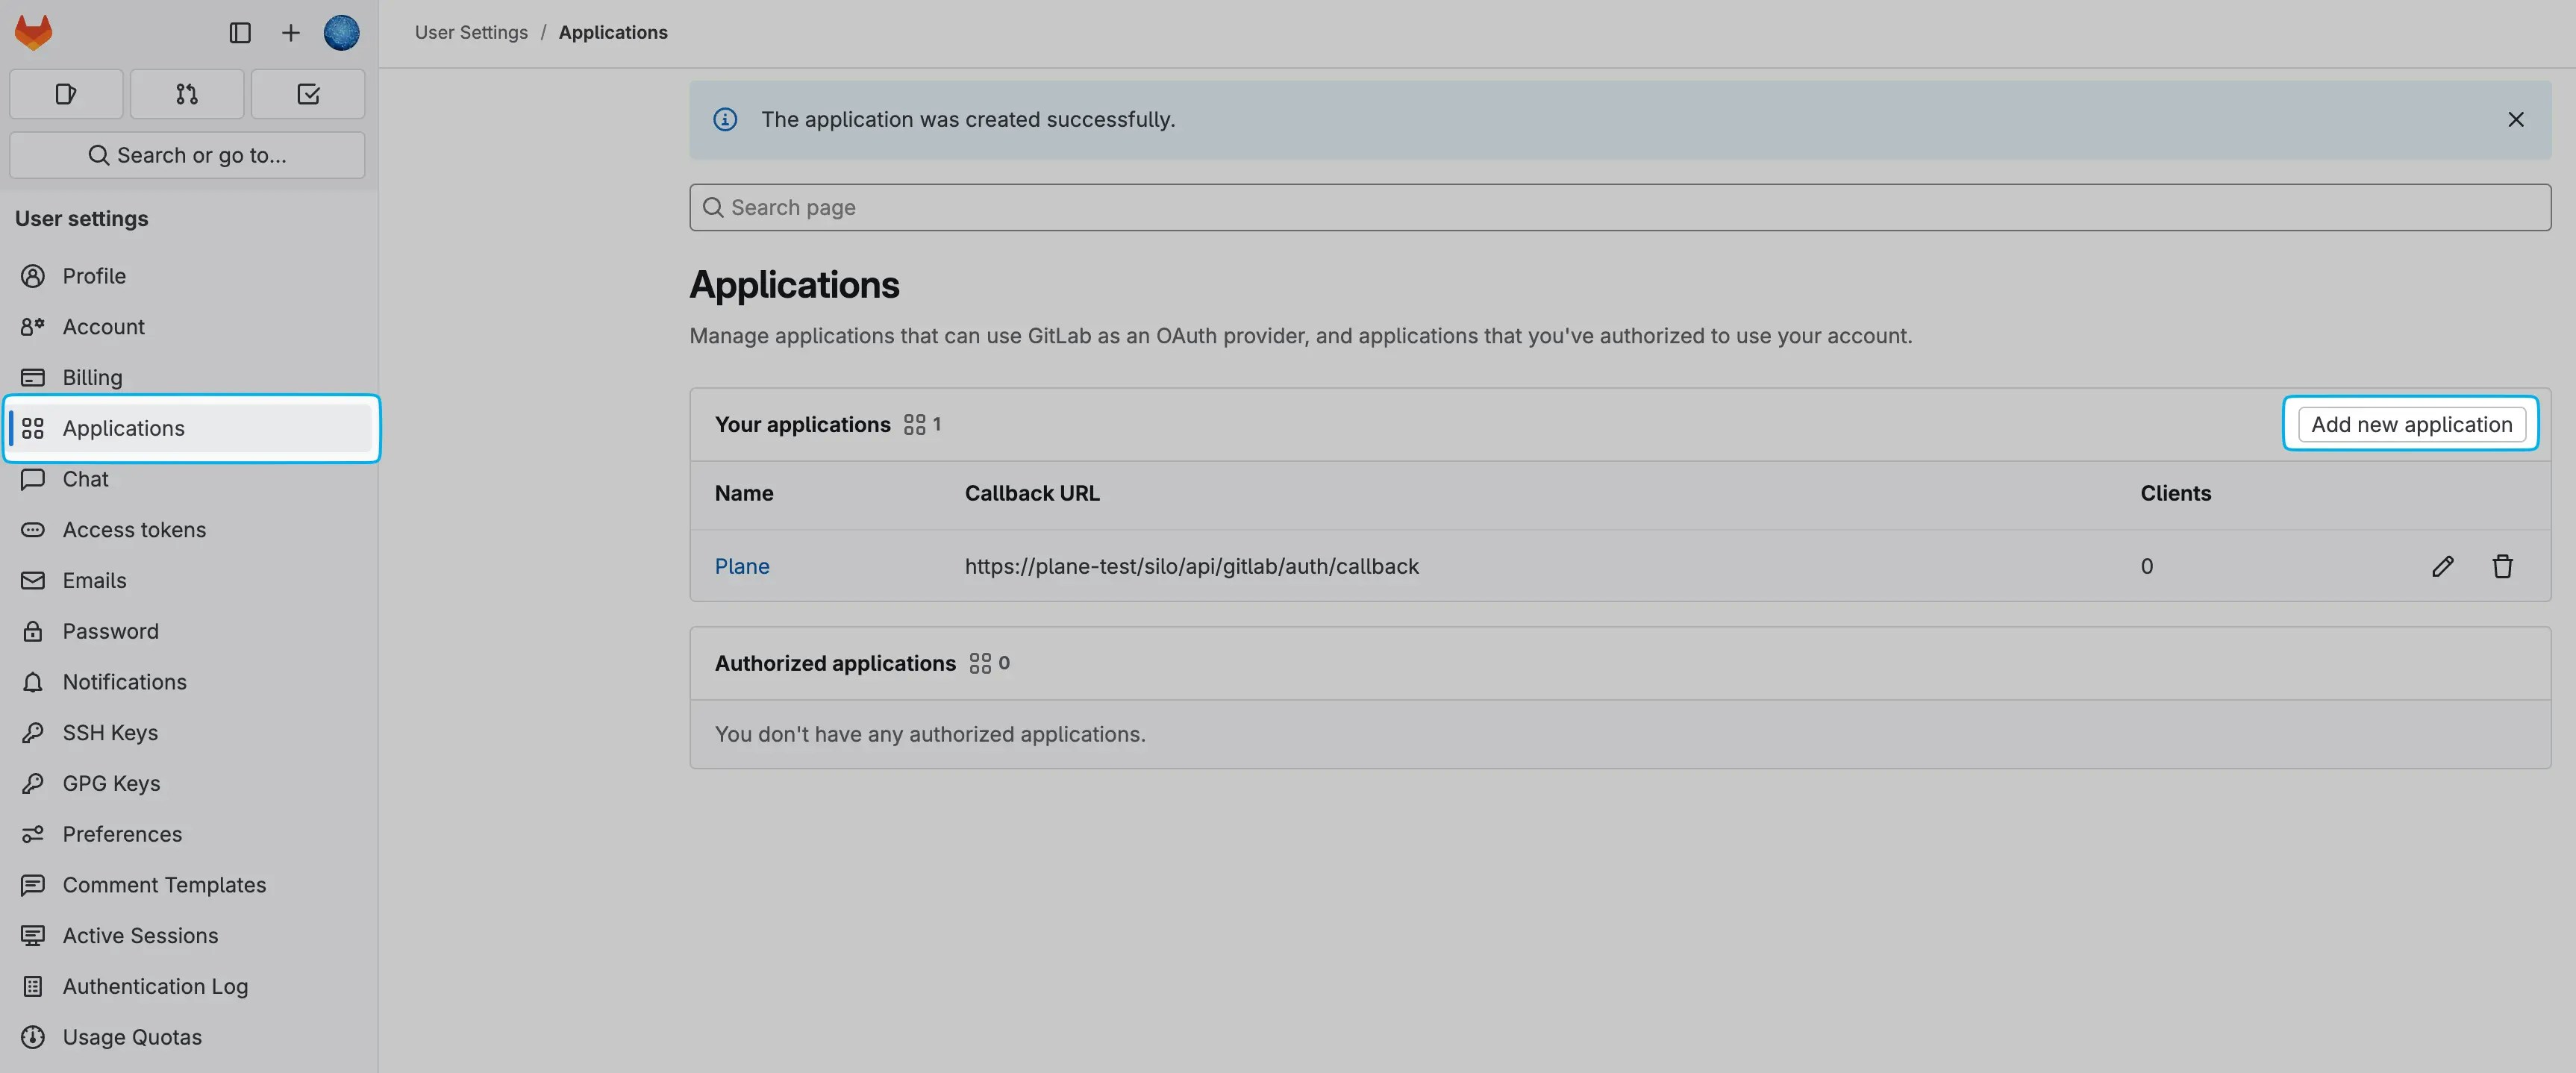
3. Navigate to the **Applications** tab.
4. Click on **Add new application** to begin the setup.
 5. Provide a **Name** for your application.
6. Enter the following **Redirect URI**, replacing \[YOUR\_DOMAIN] with your actual domain:
```bash theme={null}
https://[YOUR_DOMAIN]/silo/api/gitlab/auth/callback
```
7. Check the **Confidential** box.
5. Provide a **Name** for your application.
6. Enter the following **Redirect URI**, replacing \[YOUR\_DOMAIN] with your actual domain:
```bash theme={null}
https://[YOUR_DOMAIN]/silo/api/gitlab/auth/callback
```
7. Check the **Confidential** box.
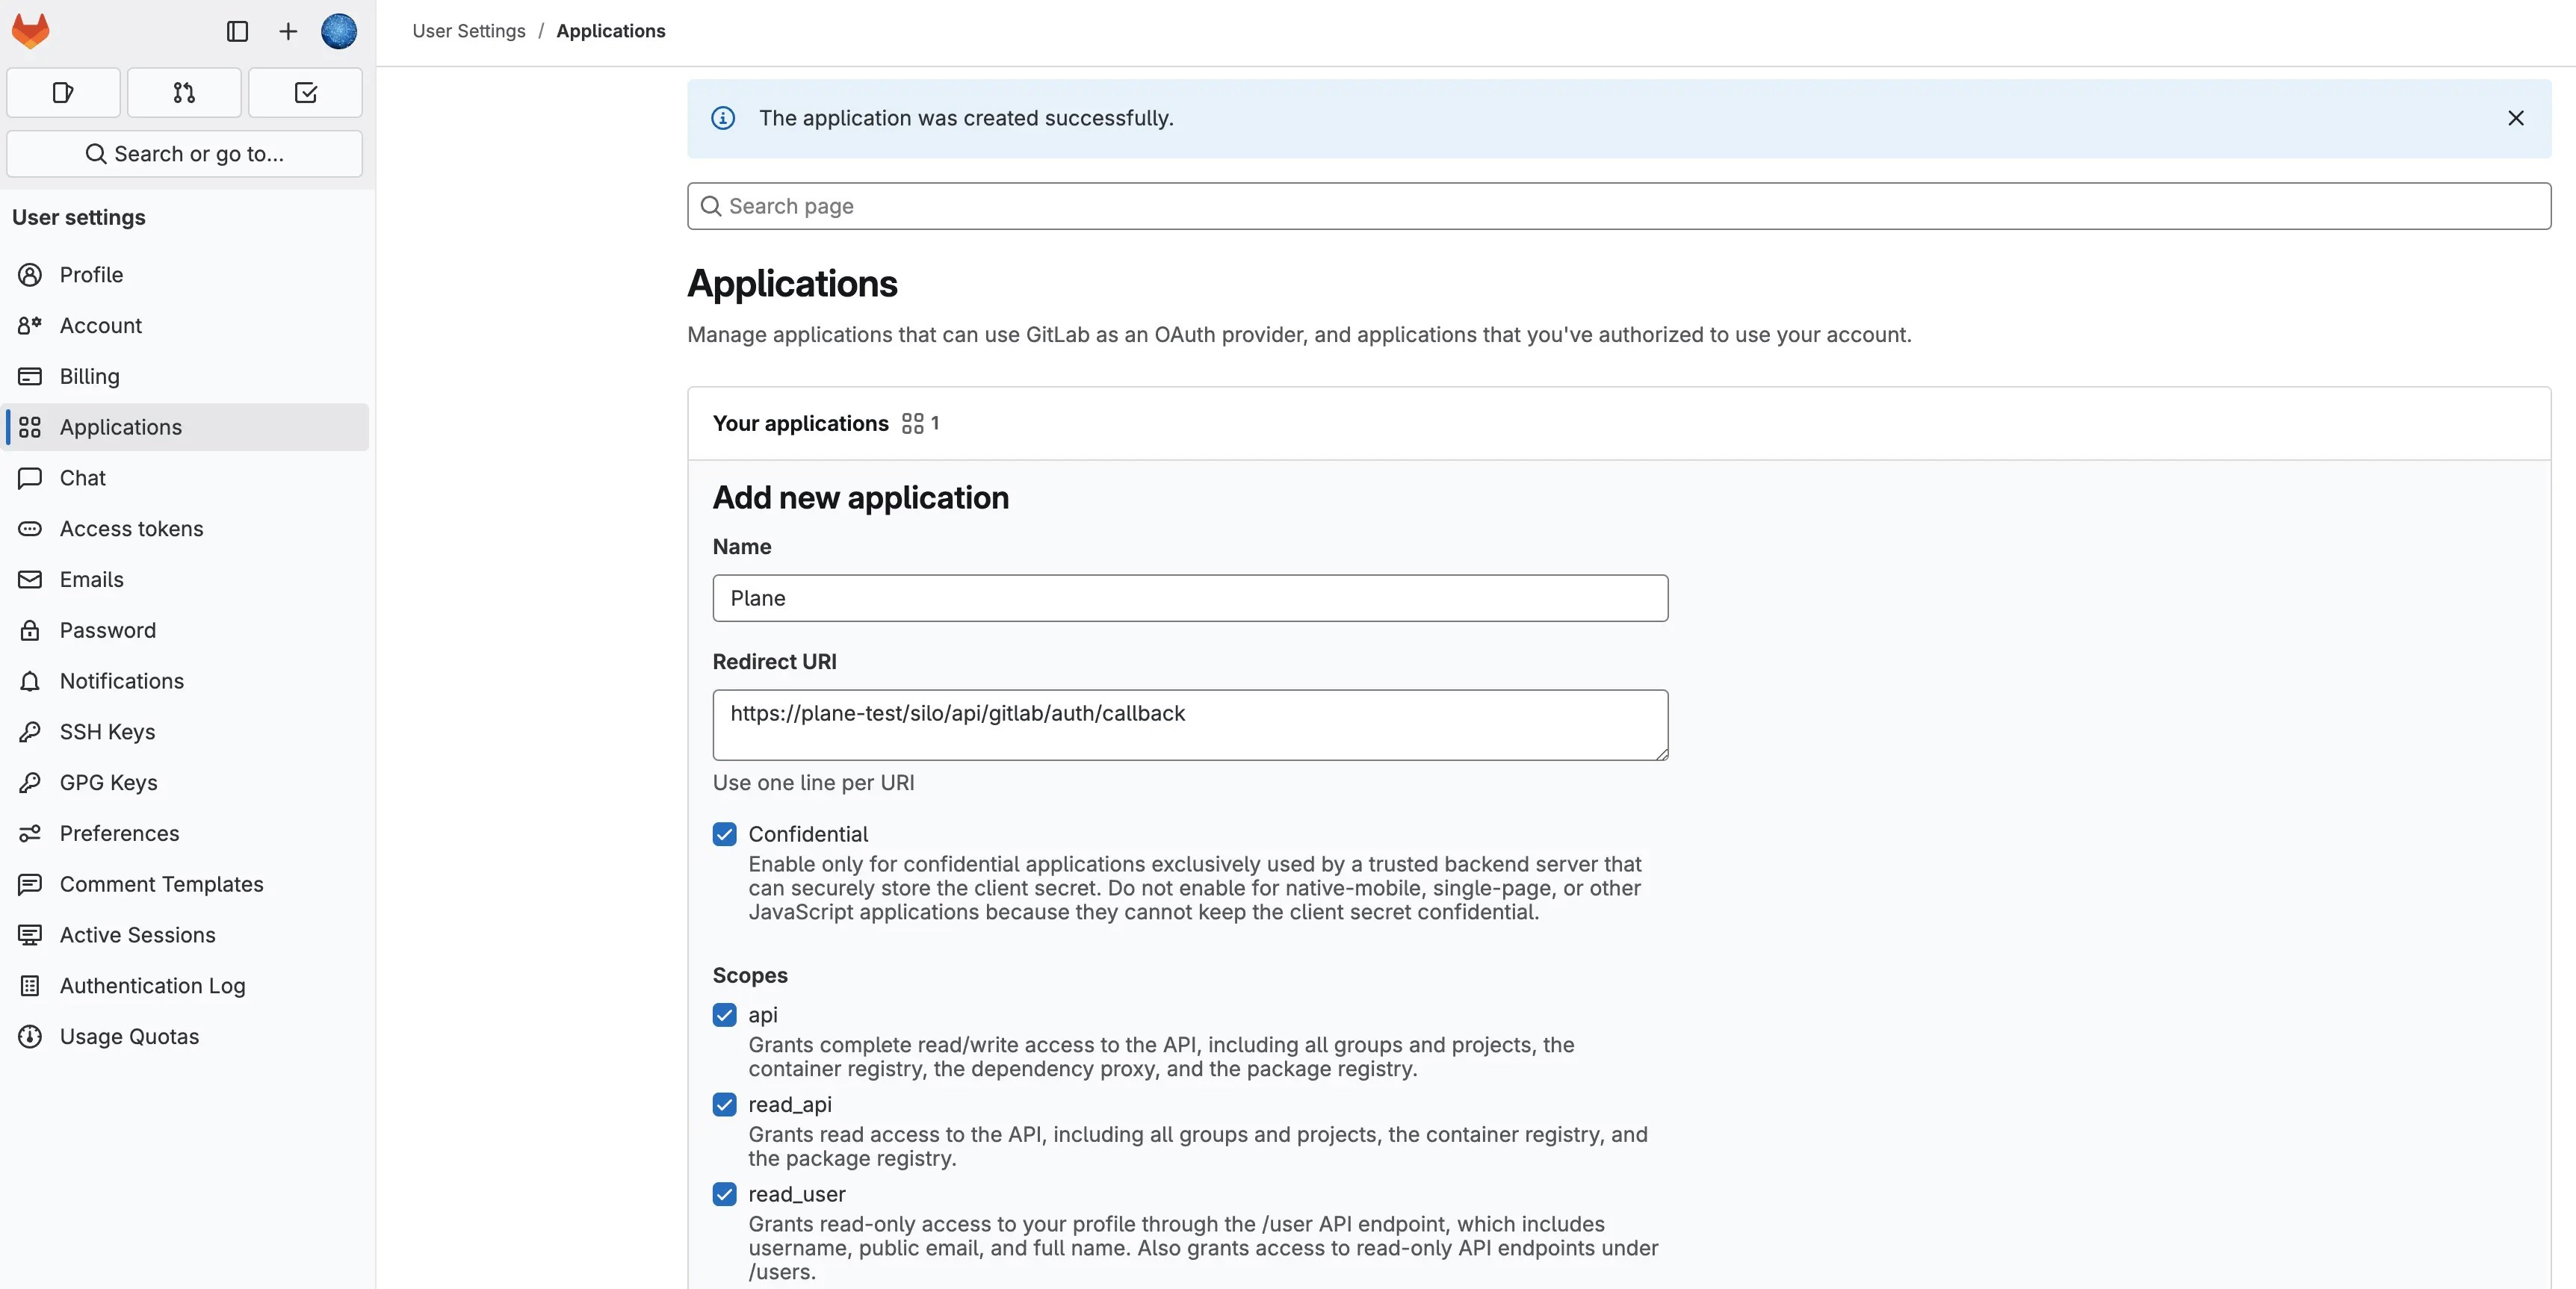 8. Set permissions by selecting the required **Scopes**. The table below explains each scope:
| Permission | Explanation |
| ----------------- | ---------------------------------------------------------------------------------------------------------------------------------------------------------------- |
| `api` | Grants full read/write access to the API, including all groups, projects, container registry, dependency proxy, and package registry. Required for API requests. |
| `read_api` | Allows read-only access to all groups, projects, container registry, and package registry. |
| `read_user` | Grants read-only access to user profiles via the /user API endpoint, including username, public email, and full name. Also provides access to /users endpoints. |
| `read_repository` | Enables read-only access to repositories in private projects via Git-over-HTTP or the Repository Files API. |
| `profile` | Grants read-only access to the user's profile data using OpenID Connect. |
| `email` | Provides read-only access to the user's primary email address using OpenID Connect. |
9. Click **Save Application** to finalize the setup.
1. Log in to your GitLab instance.
2. Click on your profile icon in the top-right corner.
3. From the dropdown menu that appears, select **Edit profile**.
4. Look for and select the **Applications** option within this menu.
5. On the Applications page, click **Add new application** to begin configuring your OAuth application.
Fill in the application details with the following configuration:
* **Name**\
Enter a descriptive name for your application (e.g., `Plane Local Dev` or `Plane Integration`).
* **Redirect URI**\
The redirect URI depends on your Plane deployment:
**For Plane Cloud:**
```
https://silo.plane.so/api/oauth/gitlab-enterprise/auth/callback
```
**For Plane Self-Hosted:**
```
https:///silo/api/oauth/gitlab-enterprise/auth/callback
```
Replace `` with your actual Plane instance domain.
* **Confidential**\
Keep the **Confidential** checkbox enabled. This ensures the application uses a client secret for secure authentication.
* **Scopes**\
Select the following scopes to grant Plane the necessary permissions:
* **api** - Grants complete read/write access to the API, including all groups and projects
* **read\_api** - Grants read access to the API, including all groups and projects
* **read\_user** - Grants read-only access to your profile information
* **read\_repository** - Grants read-only access to repositories on private projects
* **profile** - Grants read-only access to the user's profile data using OpenID Connect
* **email** - Grants read-only access to the user's primary email address using OpenID Connect
6. Click **Save application** to create the OAuth application.
## Configure Plane instance
1. Copy the **Application ID** and **Secret** from the newly created application.
8. Set permissions by selecting the required **Scopes**. The table below explains each scope:
| Permission | Explanation |
| ----------------- | ---------------------------------------------------------------------------------------------------------------------------------------------------------------- |
| `api` | Grants full read/write access to the API, including all groups, projects, container registry, dependency proxy, and package registry. Required for API requests. |
| `read_api` | Allows read-only access to all groups, projects, container registry, and package registry. |
| `read_user` | Grants read-only access to user profiles via the /user API endpoint, including username, public email, and full name. Also provides access to /users endpoints. |
| `read_repository` | Enables read-only access to repositories in private projects via Git-over-HTTP or the Repository Files API. |
| `profile` | Grants read-only access to the user's profile data using OpenID Connect. |
| `email` | Provides read-only access to the user's primary email address using OpenID Connect. |
9. Click **Save Application** to finalize the setup.
1. Log in to your GitLab instance.
2. Click on your profile icon in the top-right corner.
3. From the dropdown menu that appears, select **Edit profile**.
4. Look for and select the **Applications** option within this menu.
5. On the Applications page, click **Add new application** to begin configuring your OAuth application.
Fill in the application details with the following configuration:
* **Name**\
Enter a descriptive name for your application (e.g., `Plane Local Dev` or `Plane Integration`).
* **Redirect URI**\
The redirect URI depends on your Plane deployment:
**For Plane Cloud:**
```
https://silo.plane.so/api/oauth/gitlab-enterprise/auth/callback
```
**For Plane Self-Hosted:**
```
https:///silo/api/oauth/gitlab-enterprise/auth/callback
```
Replace `` with your actual Plane instance domain.
* **Confidential**\
Keep the **Confidential** checkbox enabled. This ensures the application uses a client secret for secure authentication.
* **Scopes**\
Select the following scopes to grant Plane the necessary permissions:
* **api** - Grants complete read/write access to the API, including all groups and projects
* **read\_api** - Grants read access to the API, including all groups and projects
* **read\_user** - Grants read-only access to your profile information
* **read\_repository** - Grants read-only access to repositories on private projects
* **profile** - Grants read-only access to the user's profile data using OpenID Connect
* **email** - Grants read-only access to the user's primary email address using OpenID Connect
6. Click **Save application** to create the OAuth application.
## Configure Plane instance
1. Copy the **Application ID** and **Secret** from the newly created application.
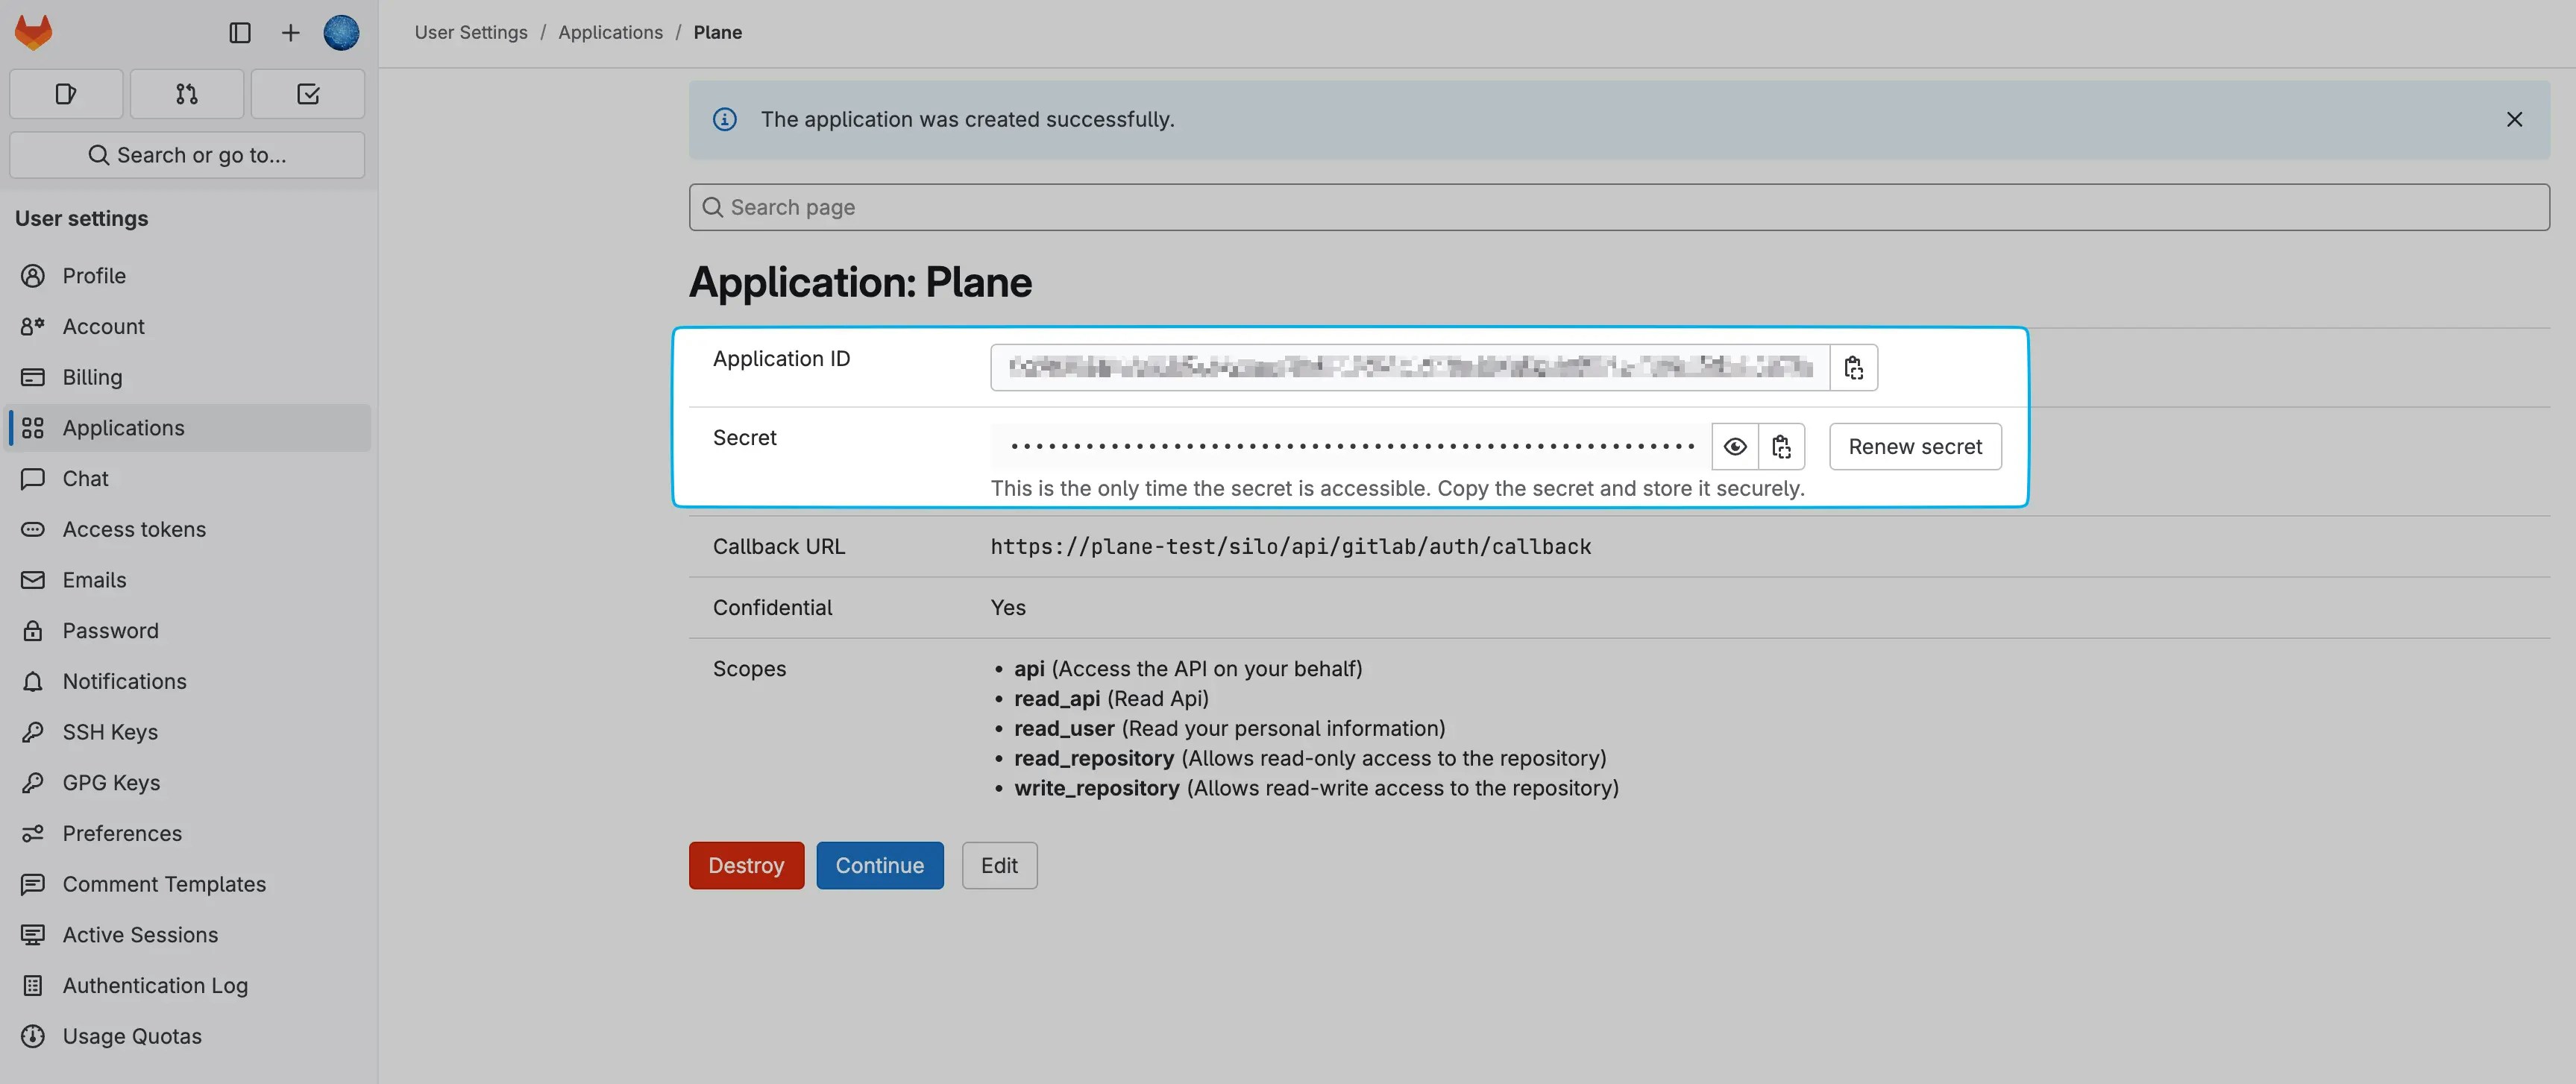 2. Add these environment variables with the values to your Plane instance's `.env` file.
```bash theme={null}
GITLAB_CLIENT_ID=
GITLAB_CLIENT_SECRET=
```
3. Save the file and restart the instance.
4. Once you've completed the instance configuration, [activate the GitLab integration in Plane](https://docs.plane.so/integrations/gitlab?edition=gitlab-cloud).
1. Copy the **Application ID** and **Secret** from the newly created application.
2. Once you've created the application, [activate the GitLab Self-managed integration in Plane](https://docs.plane.so/integrations/gitlab?edition=gitlab-self-managed).
2. Add these environment variables with the values to your Plane instance's `.env` file.
```bash theme={null}
GITLAB_CLIENT_ID=
GITLAB_CLIENT_SECRET=
```
3. Save the file and restart the instance.
4. Once you've completed the instance configuration, [activate the GitLab integration in Plane](https://docs.plane.so/integrations/gitlab?edition=gitlab-cloud).
1. Copy the **Application ID** and **Secret** from the newly created application.
2. Once you've created the application, [activate the GitLab Self-managed integration in Plane](https://docs.plane.so/integrations/gitlab?edition=gitlab-self-managed).