> ## Documentation Index
> Fetch the complete documentation index at: https://developers.plane.so/llms.txt
> Use this file to discover all available pages before exploring further.
# Google OAuth
Plane already ships with out-of-the-box support for Google OAuth. This is the easiest option to configure for Google Workspace users.
## Configure Plane as an app on Google API Console
First, you will need to identify Plane as an approved OAuth app to Google.
1. Go to the [Google API console](https://console.cloud.google.com/apis) and create a new project.
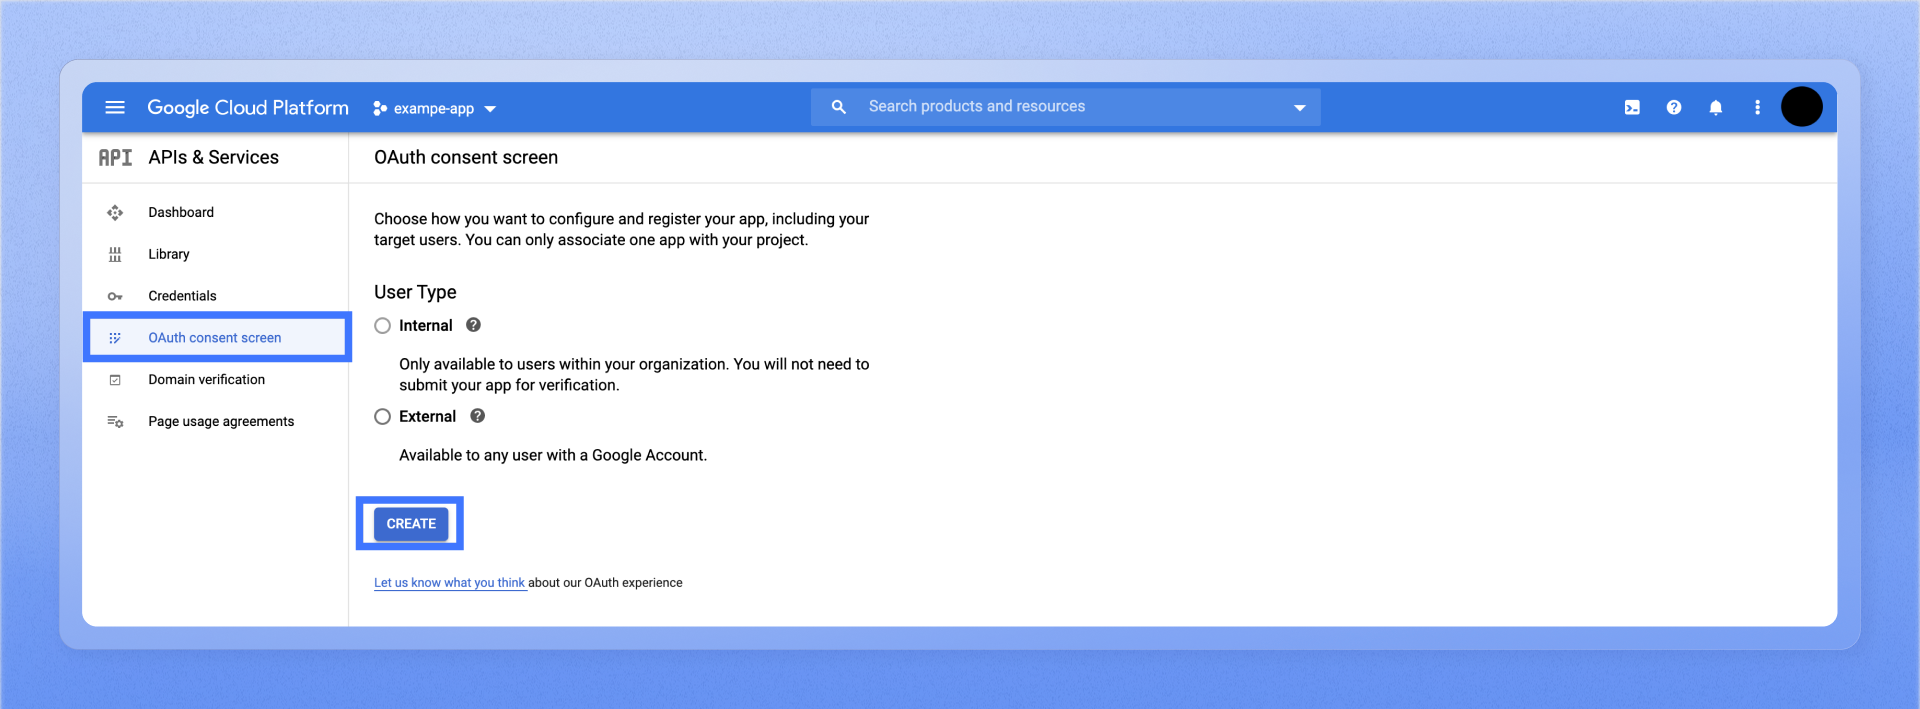
2. Navigate to the **OAuth consent screen** under **APIs & Services**. Choose how you want to configure and register the Plane app, including your target users, and click **Create**.
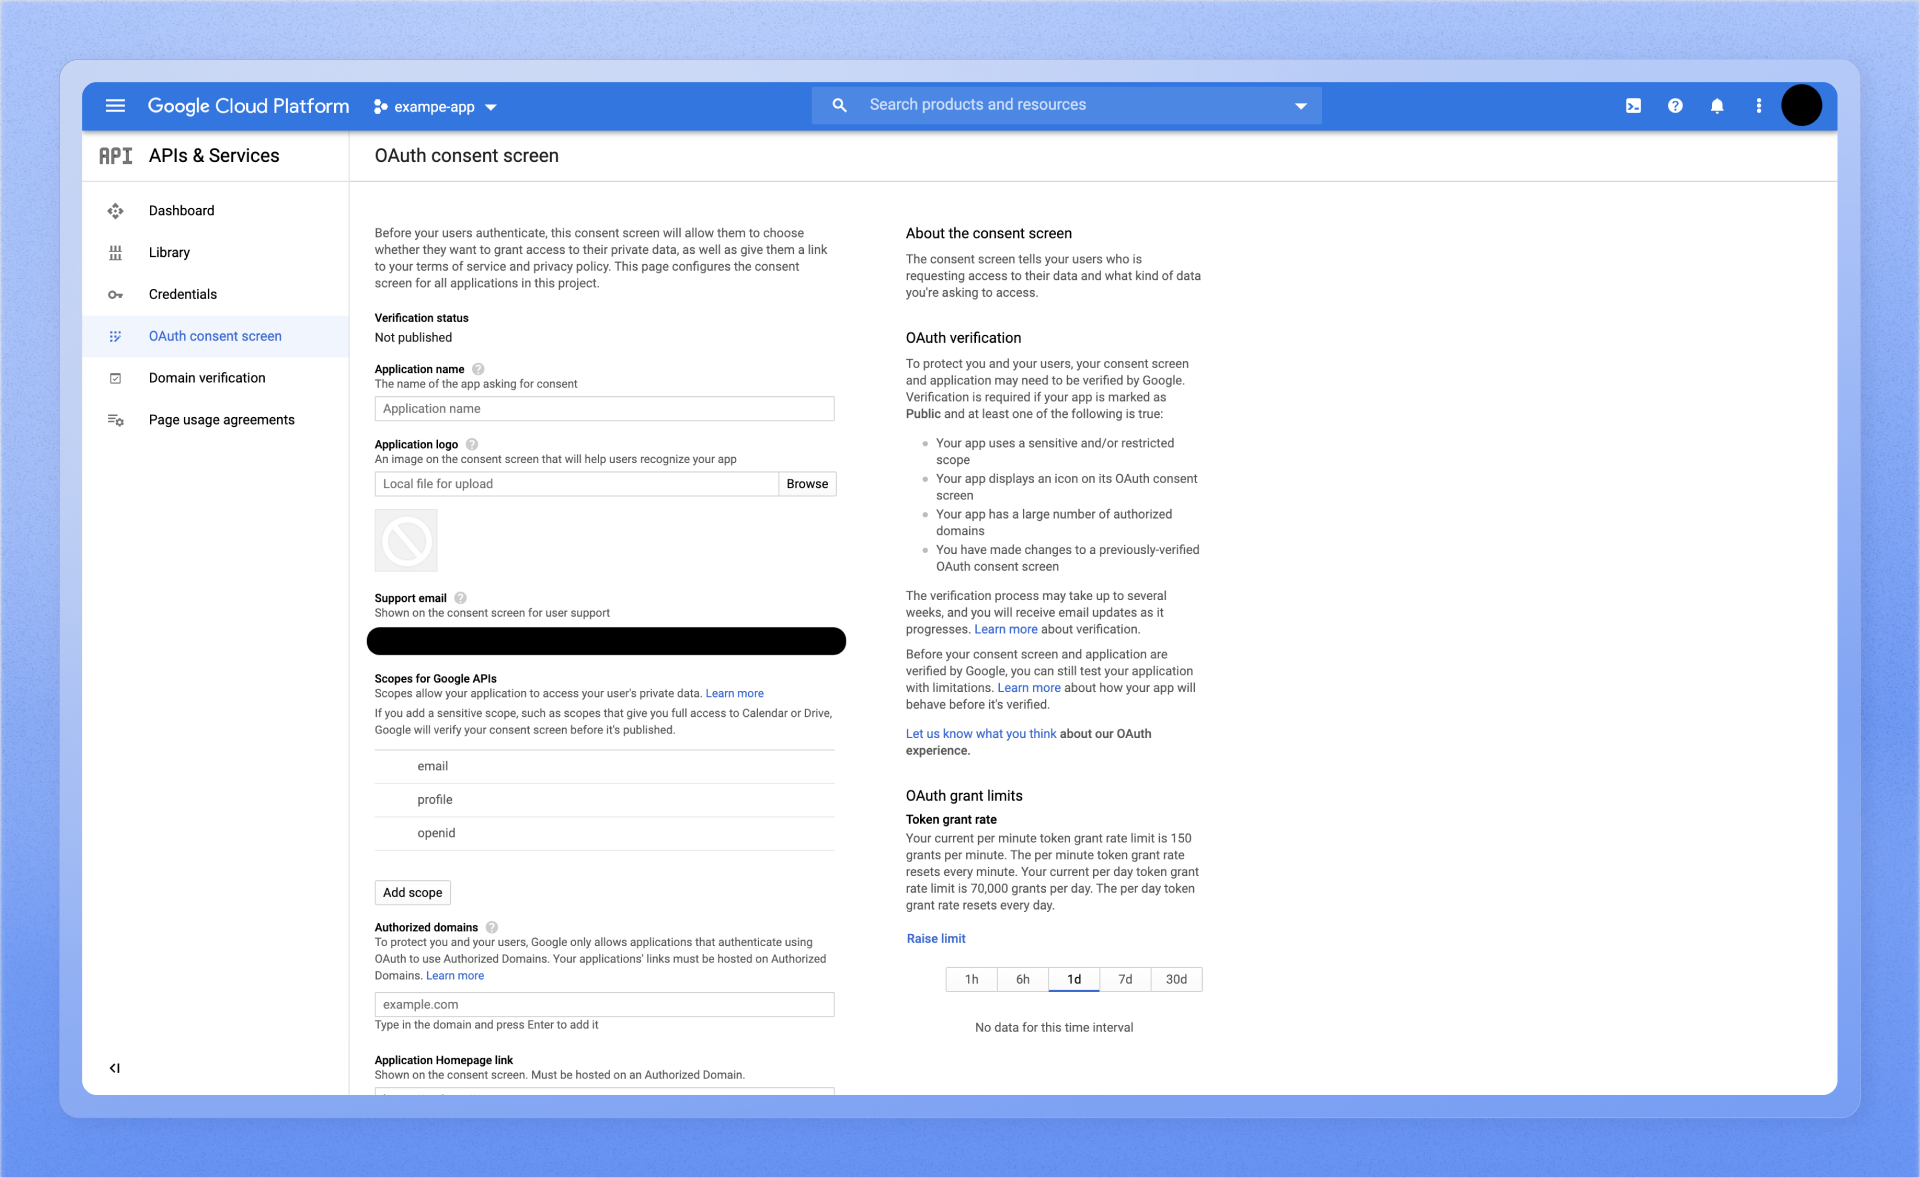
 3. Configure the OAuth consent screen with information about the app.
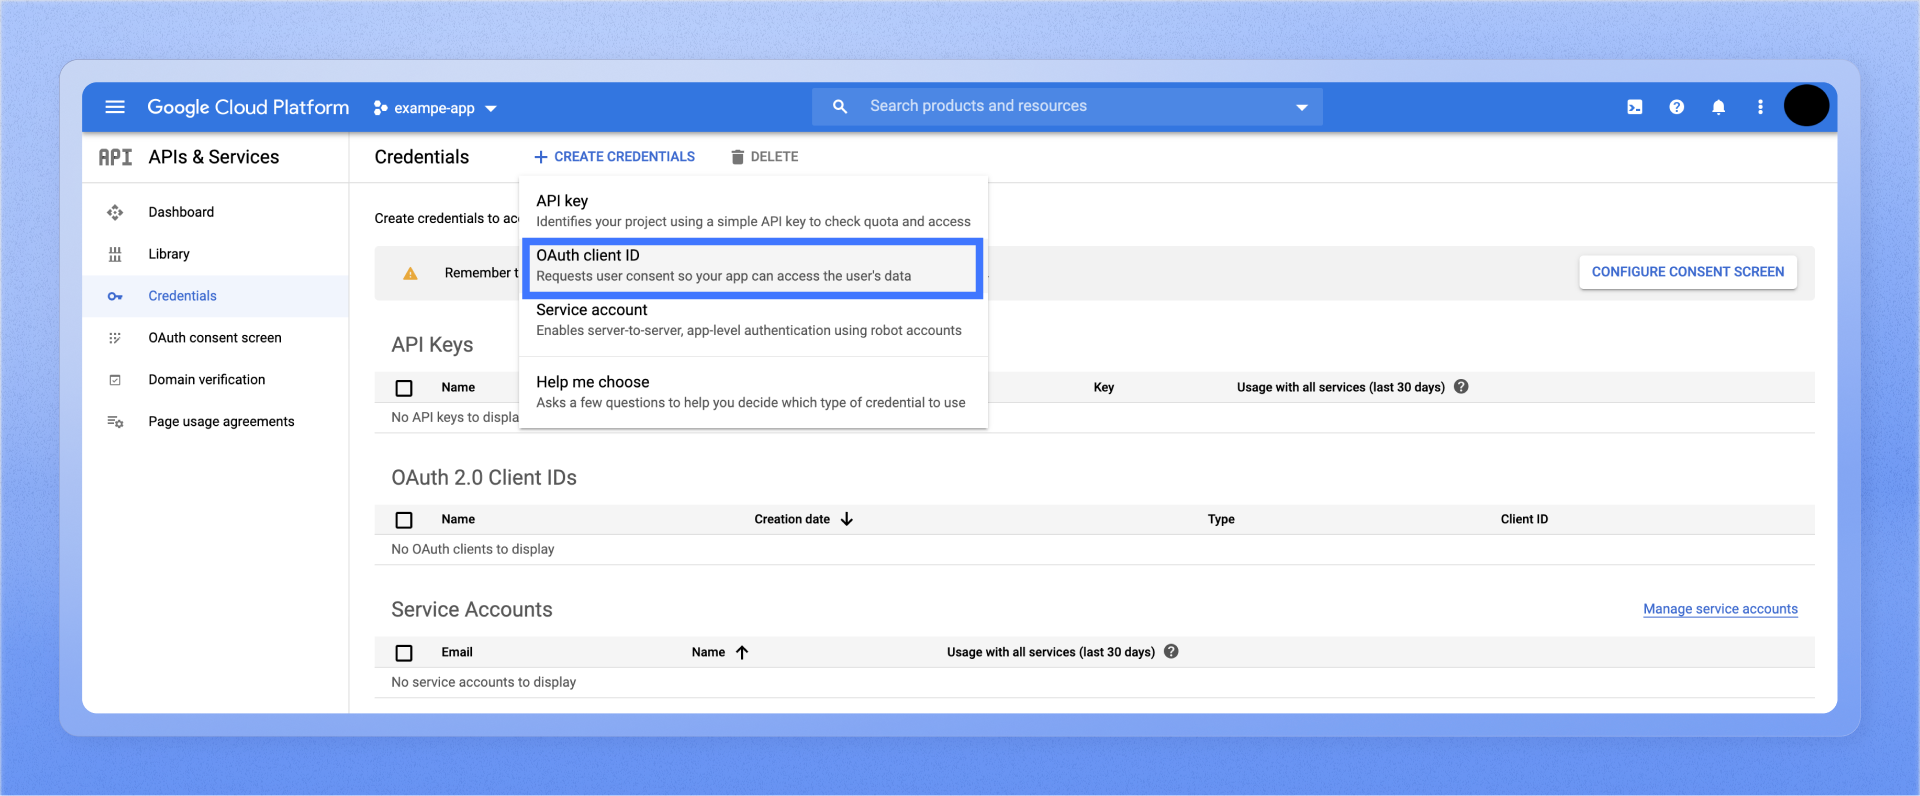
 4. Navigate to the **Credentials** screen, click **Create Credentials**, and select **OAuth client ID** from the options given.
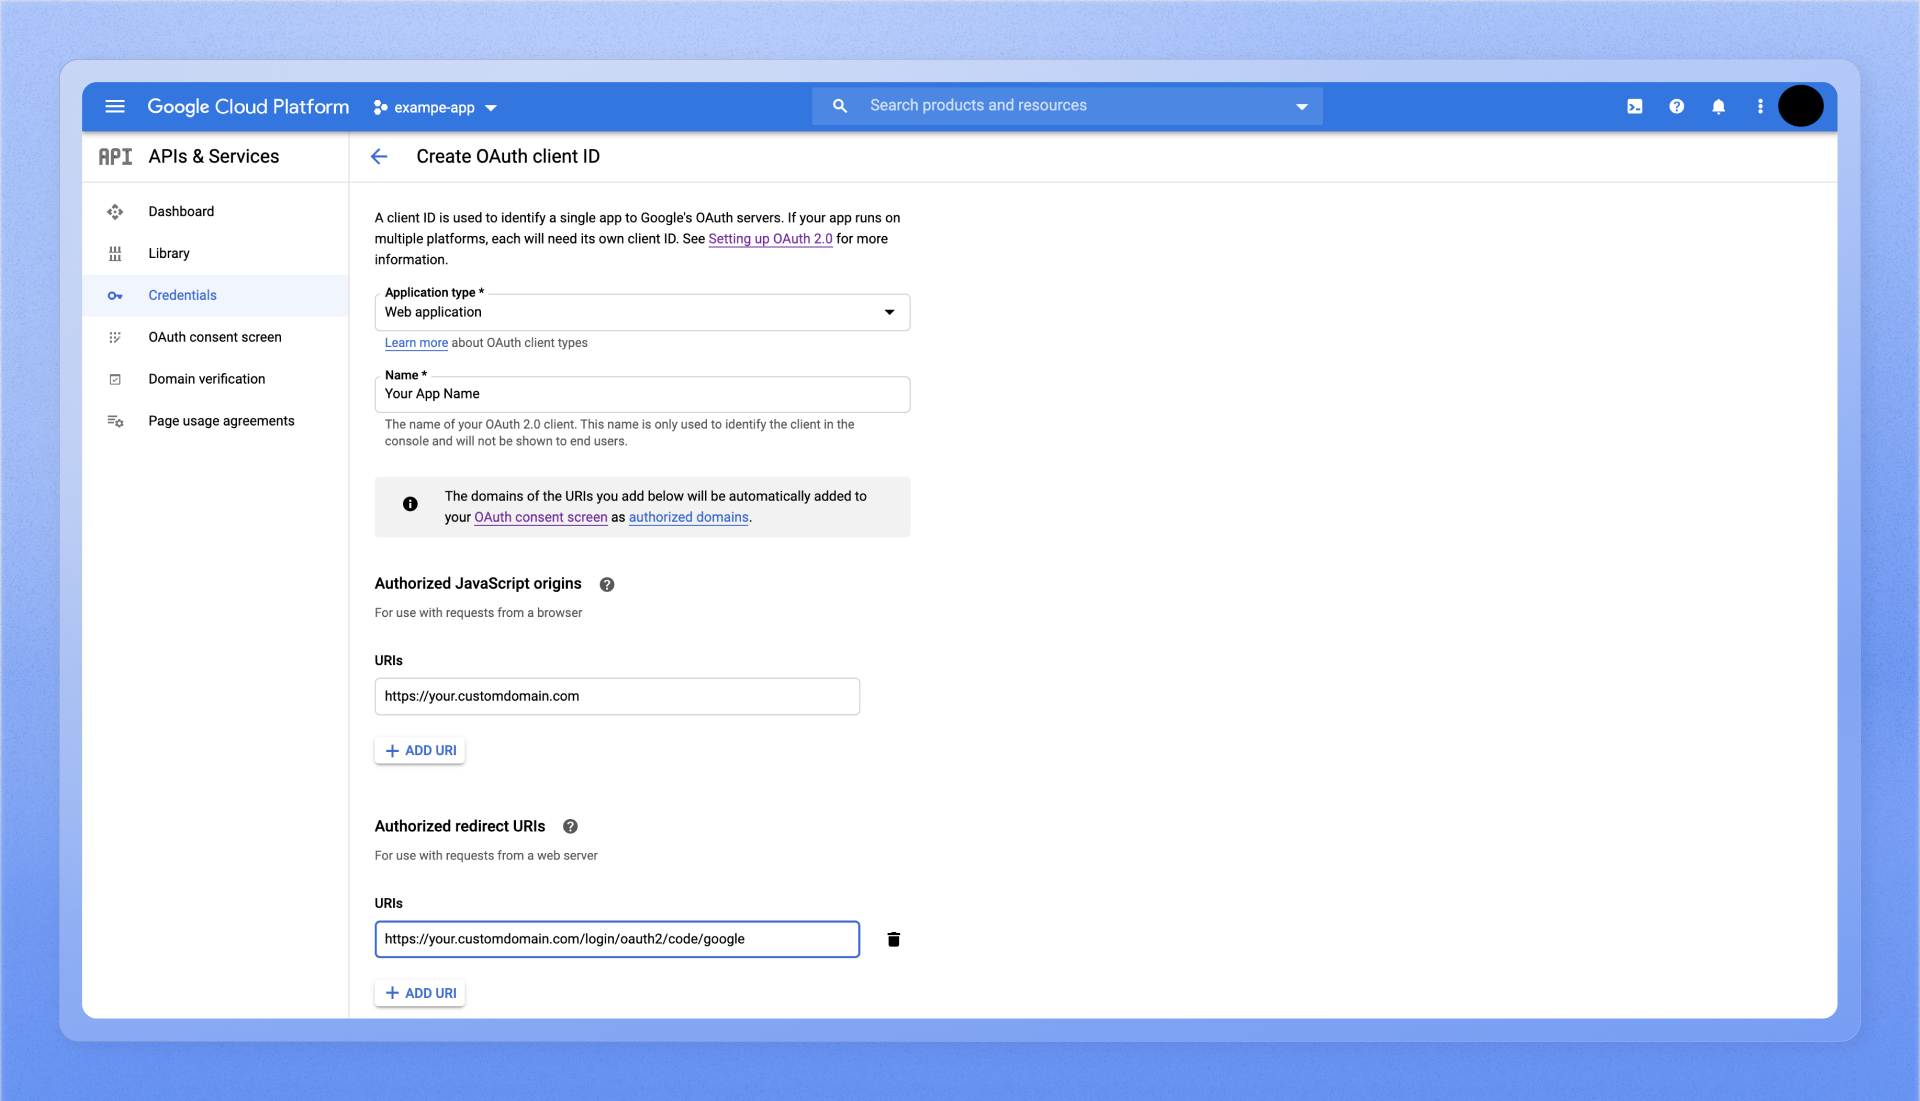
 5. Select **Web application** under the **Application type** dropdown list. Update the following fields.
1. **Authorized JavaScript origins**\
The HTTP origins that host your web application, e.g., `https://app.plane.so`
2. **Authorized redirect URIs**\
Append the path that users should be redirected to after they have authenticated with Google. `https:///auth/google/callback` and `https:///auth/mobile/google/callback/` where `` is your self-hosted instance's domain.
3. Click **Create**.
4. Get the Client ID and Client secret under **OAuth 2.0 Client IDs** on the **Credentials** screen.
5. Select **Web application** under the **Application type** dropdown list. Update the following fields.
1. **Authorized JavaScript origins**\
The HTTP origins that host your web application, e.g., `https://app.plane.so`
2. **Authorized redirect URIs**\
Append the path that users should be redirected to after they have authenticated with Google. `https:///auth/google/callback` and `https:///auth/mobile/google/callback/` where `` is your self-hosted instance's domain.
3. Click **Create**.
4. Get the Client ID and Client secret under **OAuth 2.0 Client IDs** on the **Credentials** screen.
 ## Configure Plane
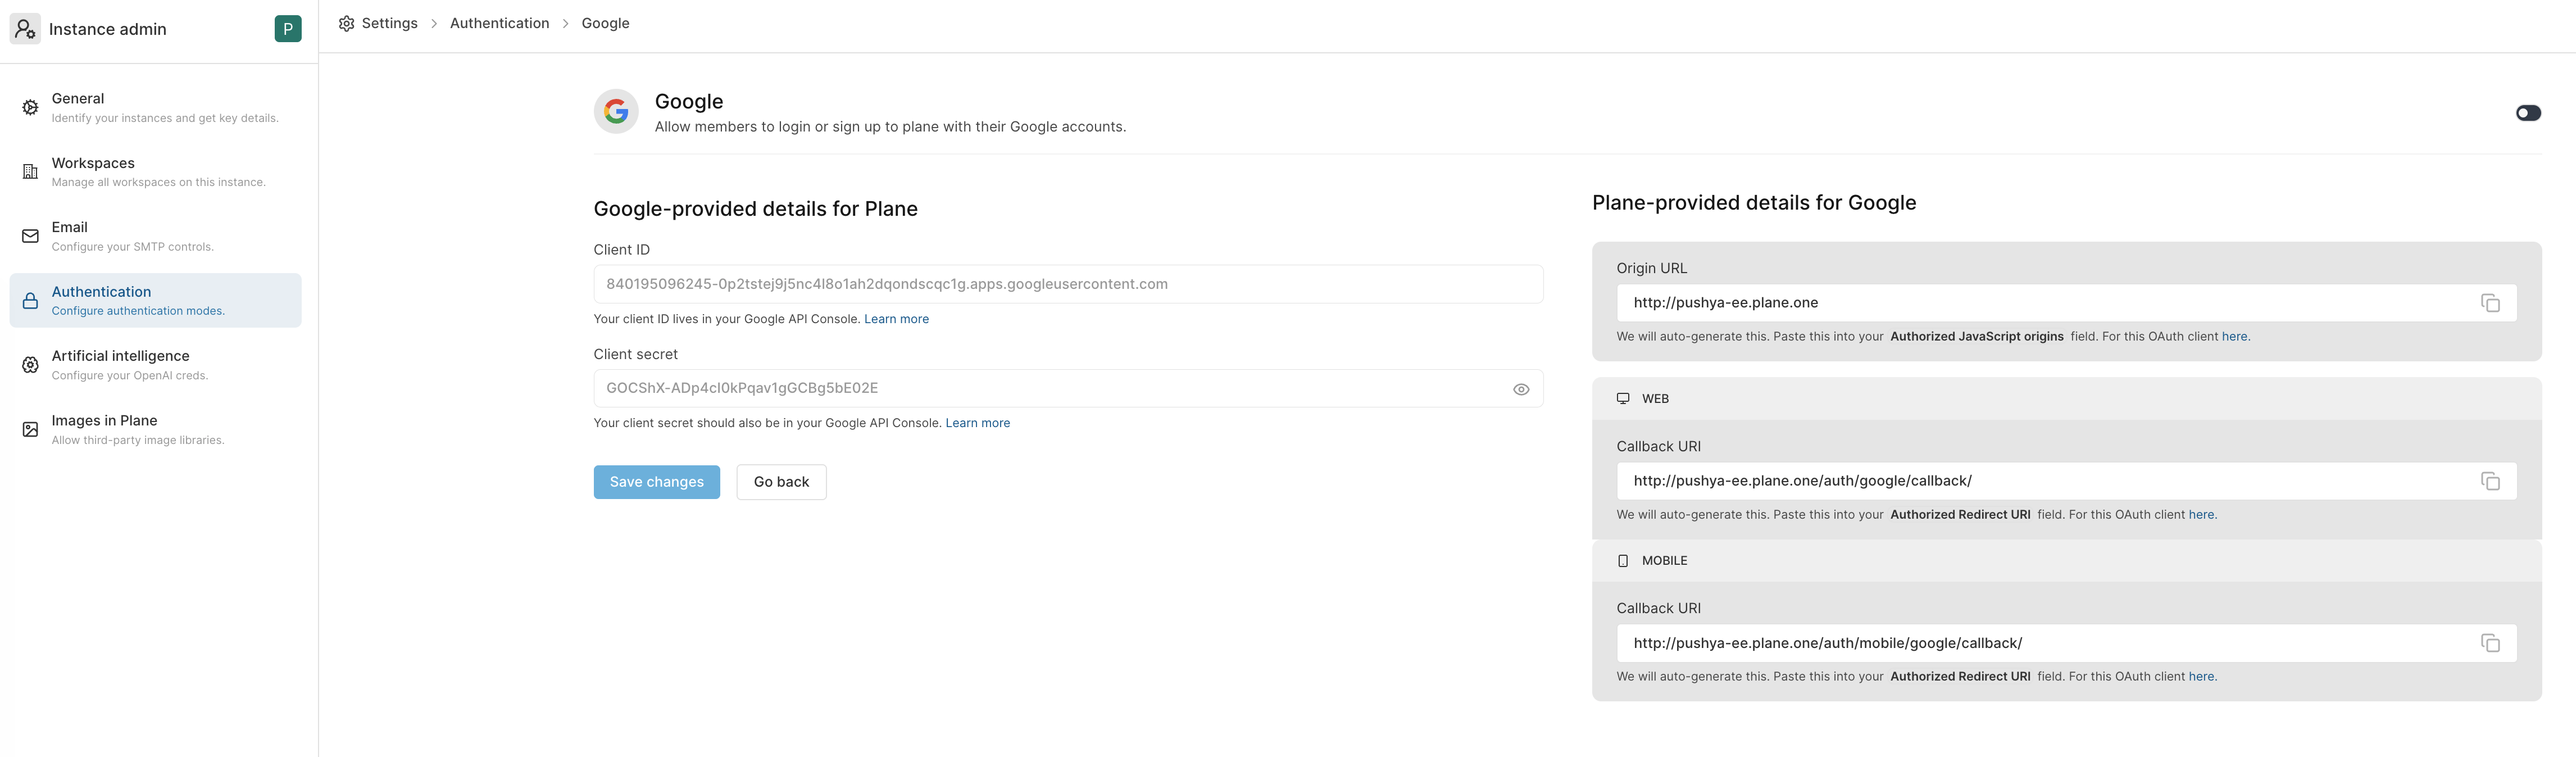 1. Go to `Google` on the Authentication screen of `/god mode`.
2. Add the client ID + the client secret from Google API Console.
3. Click `Save `.
Your Plane instance should now work with `Sign in with Google`.
We don't restrict domains in with Google OAuth yet. It's on our roadmap.
1. Go to `Google` on the Authentication screen of `/god mode`.
2. Add the client ID + the client secret from Google API Console.
3. Click `Save `.
Your Plane instance should now work with `Sign in with Google`.
We don't restrict domains in with Google OAuth yet. It's on our roadmap.